Learning to sharpen your worn-out kitchen knives is a skill you’ll value always, whether you use a sharpening stone or a handheld device.
It is important for us to know how to sharpen a kitchen knife. A sharp knife cuts more predictably and with less effort. You’ve probably experienced a terrifying incident where the knife slipped on the object you were chopping and you nearly got cut. The danger of a dull knife!
Below we introduce two ways – tabletop sharpeners and whetstones. Let’s start!
Table of Contents
Tabletop Sharpeners
The most approachable and commonly used types of knife sharpeners are handheld tabletop sharpeners, also called “V sharpeners” or “pull-through sharpeners.” These are tiny objects that have a handle on one side and typically two or three small slits on the other that you can use to run your knife blade through. They sit flat on a surface (like a counter or table).
There are two sides of abrasive material inside the slits, each with a different grit (the size or shape of the abrasive pieces). In order to create a new edge, these two pieces are arranged in the shape of a “V” and scrape metal from the blade’s sides. Each slit on the sharpener changes from coarse to fine grit. Its texture and scale are similar to sandpaper if you’ve ever used it.
If you need to sharpen a knife quickly or don’t have the tools necessary for other sharpening methods, like a whetstone, you can use this method, which is less precise than other sharpening methods, but still does the trick. The main disadvantage of this simple technique is that tabletop sharpeners do remove a little bit more material from the edge of the blade with each sharpening than do more accurate techniques; over time, this can reduce the lifespan of your knife.
This method is probably a good fit if you don’t use your knives for extended periods of time every day because you won’t need to sharpen frequently enough to significantly reduce the lifespan of your knife.
How to Sharpen a Knife With a Tabletop Sharpener?
1. Hone the Knife: You must first hone your knife with a honing steel before using a tabletop sharpener. You run the risk of misaligning the blade if you skip this step. (Imagine combing through your bangs before cutting them; if you did so with bed-head hair, you would end up with bangs that were incredibly crooked when you eventually combed them out.)
2. Position and Pull the Knife Through the Sharpener: After honing your knife, place the sharpener on a smooth surface and hold the handle in your non-dominant hand. With your dominant hand firmly holding the knife, begin by inserting the coarsest grit into the slit at the base of the blade. Quickly pull the knife through the slit in your direction. To ensure even sharpening, the entire blade—including the tip and base—must pass through the slit completely.
3. Repeat: Repeat this procedure 3–4 times with the coarse grit, followed by 5–6 times with the finer grit.
4. Wipe the Blade Clean: When finished, dry your blade completely before wiping it with a damp cloth. The metal that the sharpener sanded off should appear as a black or gray residue on the towel.
5. Hone It Again: Once more sharpen the blade quickly, and you’re ready to go!
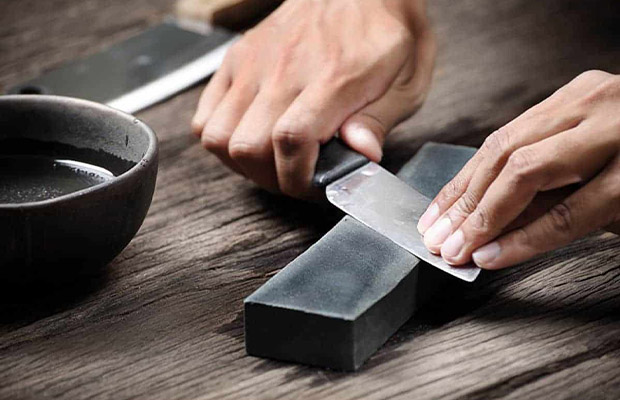
Whetstones
The process of sharpening knives and other types of blades is known as “whetting,” and the stone used for the process is known as a whetstone. Some of these stones can be used wet or dry, so you might occasionally hear them referred to as “wet stones,” even though some can be used dry. If you are a dedicated home cook who uses their knife frequently and has a firm command of knife techniques, a whetstone might be the right choice for you. When compared to a less expensive knife that a tabletop sharpener could easily take care of, buying a stone is also advised if you have a more expensive knife with an angle that requires more precise care.
Your unique needs will play a significant role in the type of stone you purchase. Whetstones have different grits, typically one on each side, but some only have one, similar to a tabletop sharpener. In order to meet their needs, serious chefs frequently have multiple stones with a wide range of grits. The amount of actual metal being removed from the edge of your knife depends on the grit; a coarse grit removes more, and a fine grit removes less.
For beginners, we advise the 1000/6000 grit variety of the Sharp Pebble brand whetstone. In addition, if you’re not using your knife for 10 hours a day like some professionals do, you probably won’t need to remove much of the blade anyway since neither of the grits offered with this model are particularly coarse.
In order to make it simpler to maintain stability while in use, this stone also includes a base and rubber gripper. Some stones, as was already mentioned, can be used dry, but this one must be wet. For anyone who is a beginner or even an intermediate whetstone user, we highly recommend a wet-use stone. Dry stones can potentially irreparably harm the edge of your blade if used improperly.
How to Sharpen a Knife With a Stone?
1. Soak the Stone: Before you can use a whetstone, you need to do a little bit of preparation. Make sure to soak a stone in advance if it needs to be wet before using it. A glass baking dish filled with water is ideal for this; you must completely submerge the stone in it until there are no air bubbles. Some people claim that 15 minutes of soaking is sufficient, but you should err on the side of caution and soak your stone overnight before using it for sharpening the next day.
2. Hone the Knife: When you’re ready, sharpen your knife. If you don’t hone it first, you run the risk of seriously misaligning the blade when using a tabletop sharpener.
3. Set Up Your Station: To catch the water that splashes off, spread out a dry towel. (Having a second dry towel on hand will help keep the handle and your hands dry.) You are now ready to begin after setting your stone up longways on the towel and in the rubber base, if your stone has one.
4. Sharpen the First Side: Start using the stone’s coarser grit, which is the lower number; for the above-mentioned Sharp Pebble stone, that is the 1000 grit. Add a few water drops to the surface to make it nicely moist. Then, holding the knife with your right hand, pinch the blade between your thumb and the first joint of your index finger, wrapping your other fingers around the handle. Your left hand will serve as your knife’s guiding and stabilizing hand; place it on the stone with the blade at a 45-degree angle and the four fingers of your left hand on it with the tips facing the edge. Place the lower portion of your knife’s edge in the upper left corner of the stone. Pull the knife towards you, keeping it at a 45-degree angle, until the tip is in the lower right corner. Repeat this motion for 5–10 more times on one side, depending on how dull your knife is, sprinkling more water onto the stone as necessary to keep it moist.
5. Sharpen the Second Side: To avoid any type of slipping, be sure to dry your hands as well as the knife’s handle. Switch hands and use your right hand’s fingers to stabilize while holding the knife handle in your left. Keep the pressure and angle constant as you pull the knife from the upper right corner’s base to the lower left corner. The motion of one side feels very natural to most people, while flipping to the other side feels somewhat unnatural. Because of this, even though it might seem awkward at first, practice makes perfect. The most crucial thing to remember when using a whetstone is to make sure you sharpen each side equally. To put it another way, if you made eight passes along the stone on the first side, make sure to make eight passes on the second side as well.
6. Flip the Stone: Finally, flip the stone over to the finer, or “finishing,” grit and repeat the whole process again with the same number of passes on each side. While maintaining a 45-degree angle while making the same number of passes on each side may take some getting used to, your blade will end up sharper.
7. Wipe the Blade Clean: After you’re done, wash the blade with warm, soapy water and wipe off any remaining metal shavings. You’re done when you completely dry the knife with a fresh towel.
How to Test the Sharpness of the Blade?
- Paper method: use the weight of your knife to shave thin strips of paper. A dull blade will leave jagged edges or become caught, whereas a sharp blade will cut cleanly and quickly. A dry knife or piece of paper should be used.
Without catching or tearing the paper as the knife cuts through, you should be able to cut strips from the piece of paper with ease. - Nail method: gently use the weight of the knife and place the blade on your fingernail. The blade will slide across if it is dull, but if it is sharp, it will dig in slightly and you will feel a tiny resistance. However, exercise caution because exerting too much pressure can severely harm the surface of your nails.
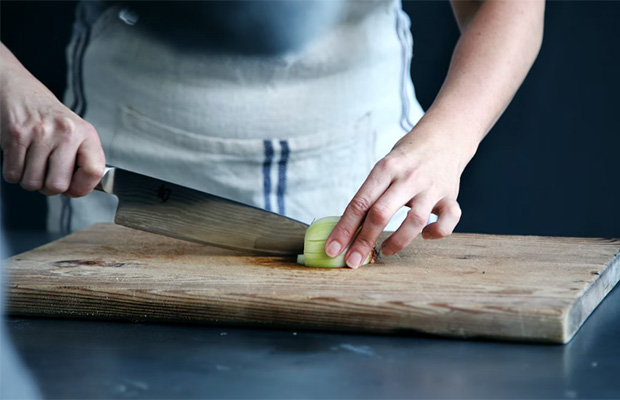
- Food test: there’s no better way to test the sharpness of your knife than cutting food. Simply test your knife on the ingredients it will be used for, such as tomatoes, scallions, and onions.
General Tips
- Even if a knife is dishwasher safe, you shouldn’t put it in the dishwasher because the blades could get damaged if it bumps into other dishes or baskets.
- They can be hand-washed in hot, soapy water, then dried right away.
- In order to prevent blade damage, avoid storing knives in drawers with other cutlery or knives.
- Think about purchasing personal sleeves or knife guards for protection.
- Look for knife blocks with horizontal slats when purchasing one so that the knives won’t rest on their edges.
Read More: How To Choose A Kitchen Sink?
FAQs
Can I Sharpen My Knives Myself?
If you want to take charge of your knives and do your own sharpening, there are good knife sharpeners for home use. When you consider the cost of sharpening knives a few times a year over many years, they may still be less expensive than professional sharpening.
Is It Better to Sharpen a Knife Wet Or Dry?
Natural sharpening stones can be used dry or wet, but wet is recommended. Water, water-based honing oil, or petroleum-based honing oil ensures a smooth sharpening action, dissipates frictional heat, and keeps the stone’s pores clean.
Final Words: Keeping Your Knife Sharp
When you take the time to sharpen your knife, you’ll want to preserve that new edge for as long as you can to prevent unintentionally going back to a dull blade.
To achieve this, keep your knife away from other metals. Thus, never throw your knife in the sink and refrain from storing it loosely in a drawer with other kitchenware.
Most importantly, no matter what, never put your knife in the dishwasher; that’s a one-way ticket to a ruined knife. Always store your knife in a plastic sheath and hand-dry and clean it.
Read Next: