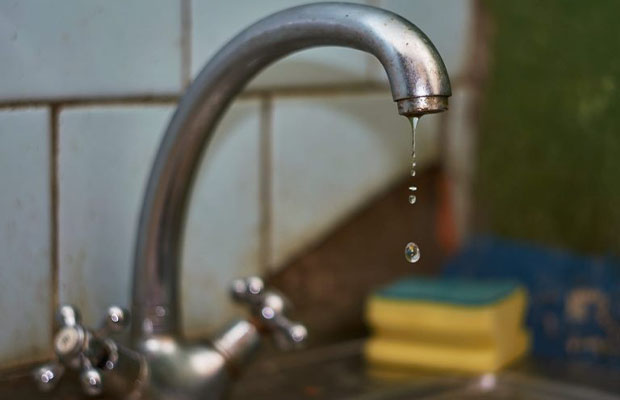
Does the faucet in your shower, bathtub, or kitchen leak? Kitchen and bathroom faucet leaks can be expensive and frustrating. With our detailed instructions, you can learn how to fix a leaking kitchen faucet.
An annoying faucet that drips or leaks can keep you up at night. A dripping faucet can waste a tremendous amount of water, in addition to other things.
Fortunately, you don’t need to call a plumber to fix most leaky faucets; you can simply fix them yourself. Continue reading to see our detailed instructions.
Table of Contents
How to Fix a Leaky Cartridge Faucet?
- Remove the handle screw, pry off the decorative cap, tilt the handle back, and then pull it off.
- Use needle-nose pliers to remove any threaded retaining clips holding the cartridge in place, then raise it straight up.
- Use a utility knife to remove the old O-rings and remove the spout. Apply heat-resistant, nontoxic plumber’s grease to the new O-rings.
- Match the lengths of the new and old cartridges to replace the entire cartridge. The stem end where the handle is attached should also match.
How to Fix a Leaky Compression Faucet?
- New seat washers are typically required for leaky compression faucets. The handle’s decorative cap can be removed by using a utility knife or a small slotted screwdriver, revealing the fastening screws.
- Pull off the handle after removing the handle screw with a screwdriver.
- To remove the packing nut and to separate the stem from the faucet body, use an adjustable wrench and a crescent wrench.
- To remove and replace the seat washer, unscrew the rubber washer from the stem’s bottom end.
- Apply heat-resistant plumber’s grease that is non-toxic to the washers.
- The O-ring, which causes leaky handles, should be replaced. Remove the packing nut’s stem. O-rings come in sizes ranging from 3/8 to 5/8 inches, so it’s important to match the faucet’s exact size. Use plumber’s grease to coat the new O-ring.
- A retainer is a circular, recessed disk that the washer rests in. Replace the retainer ring and grind the damaged original retainer flush if necessary. If your faucet keeps dripping, the seat might be pitted.
- To smooth the top end of the seat, remove the stem and sand it with emery cloth.
- If the original seat cannot be fixed, a new one should be installed.
Read More: How to Replace Kitchen Faucet?
How to Fix a Leaky Ceramic Disk Faucet?
- To reach the set screw, push the handle back. Lift off the handle after unscrewing the bolt.
- The disk cylinder should then be lifted out after removing the escutcheon cap and the mounting screws.
- To remove the neoprene seals from the cylinder, use a blunt screwdriver. Replace the seals if they’ve been harmed.
- Clean the cylinder openings with distilled white vinegar and a soft scouring pad, then give them a thorough rinse.
- Reassemble the faucet after replacing the seals.
- Move the handle to the “on” position and turn the water back on slowly—the force of the returning water can fracture the ceramic disk.
- Set the new mounting screws in place and tighten them if you’re replacing the entire cylinder (which is typically not necessary).
How to Fix a Leaky Faucet Ball-Type?
Due to the large number of parts in this type of faucet, it is frequently challenging to identify the source of leaks. By purchasing a replacement kit and installing all new parts, you can avoid the frustration.
- Pull the small index cover from the faucet’s side using a pocketknife to reveal the hex-head screw.
- The faucet handle can be removed by loosening the screw with a hex-key wrench.
- To take off the cap and collar, use a pair of flexible pliers.
- The faucet cam, cam washer, and rotating ball can all be removed by loosening them with the special tool that is provided in the faucet repair kit.
- Use needle-nose pliers to reach into the faucet body and take out the rubber seats and springs.
- Put a fresh spring and rubber seat on the pencil’s point, then insert it into the faucet.
- Install a second seat and spring by repeating the process.
- Make sure to line up the keyway on the stainless steel ball’s replacement with the corresponding tab inside the faucet body.
- Replace the rubber gasket and cam cap on top of the stainless steel ball.
- Align the keyway on the cap with the corresponding slot.
- Reinstall the faucet’s top cap assembly, hand-tightening it in place.
- To ensure the proper tension against the stainless-steel ball, tighten the nut using a spanner wrench.
Why Your Faucet Leaks Or Drips?
In order to regulate the water flow, faucets either have compression valves that open and close or sink cartridges. Wearing cartridges or stem assembly washers are the main causes of faucet leaks. Most faucet leaks can be fixed by replacing these components.
Worn Sink Cartridge
Sink cartridges that regulate water flow are frequently hidden beneath the faucet handles on single- and double-handle faucets. Sink cartridges, which are made of plastic and metal and are self-contained, can be taken out and changed one for one but cannot be repaired.
You must buy the exact type of cartridge for your bathroom or kitchen faucet because sink cartridges are made for a specific brand and model of faucet.
Worn Compression Faucet Washer
The compression valve faucet is an additional type of faucet. Compression faucets, which are frequent in older homes, turn off the water when the handle is turned, compressing a stem washer that is part of the assembly.
This silicone or soft rubber washer will gradually deteriorate. No matter how tightly you tighten the faucet, the water never completely stops flowing.
The typical fix for this kind of leak is to replace the stem washer. The majority of compression faucet leaks can be fixed with this easy, low-cost fix.
Read More:
FAQs
What Causes a Kitchen Faucet to Leak at the Base?
These leaks are most prevalent in fixtures with dirty or worn-down O-rings, the seal at the faucet base.
What is the Most Common Cause of a Leaky Faucet?
A worn-out washer is perhaps the most common cause of a dripping, leaky faucet. The washer rubs against the valve seat each time a faucet is used, causing friction and wearing the part down. Replacing the washer will stop dripping brought on by worn-out rubber washers.
Why Does My Faucet Drip After I Turn It Off?
If your faucet is dripping water after it is shut off, this may be indicative of a loose or damaged seat washer. Sink faucet leaks are frequently caused by washer problems. After prolonged use, the seat washer screw may come loose, resulting in water dripping or chattering from the faucet.