
Knowing how to remove a kitchen sink is an extremely useful skill to have and will save you a significant amount of plumber costs. We walk you through a very basic, step-by-step tutorial on removing a sink in this article.
If your kitchen has been renovated, you might need a new sink style, or if your sink has been around since your parents’ time, it may be rusting or cracked. Fortunately, removing a kitchen sink isn’t too difficult.
Keep reading, you will know removing a kitchen sink is not a difficult thing.
Table of Contents
Why You May Need to Remove a Kitchen Sink?
It may be time for your kitchen sink to go for multiple reasons. It’s possible that you’re redecorating and your current sink doesn’t go with the style you’ve decided on.
Or perhaps your sin’s existence is coming to an end. While acrylic sinks may last 50 years or more, enameled steel kitchen sinks may live less than 10 years.
Sinks made of porcelain might crack. For whatever reason you need a new sink, we’ve got you covered.
How to Remove a Kitchen Sink?
You will need:
- Adjustable wrenches
- Pliers
- Screwdriver
- Stanley knife or similar
- Small bucket
- Old towel
Before you remove your kitchen sink, take a picture of your plumbing setup below the sink before you rip out your old unit, both for your reference and that of a plumber in case the unthinkable occurs!
1. Turn Off the Water
Turn off the water supply lines first. You will most likely locate the shut off valves in the cabinet below the sink, yet can just turn off your home’s main water line if you cannot find them.
Now turn on your kitchen sink taps to relieve the water lines of any remaining water pressure.
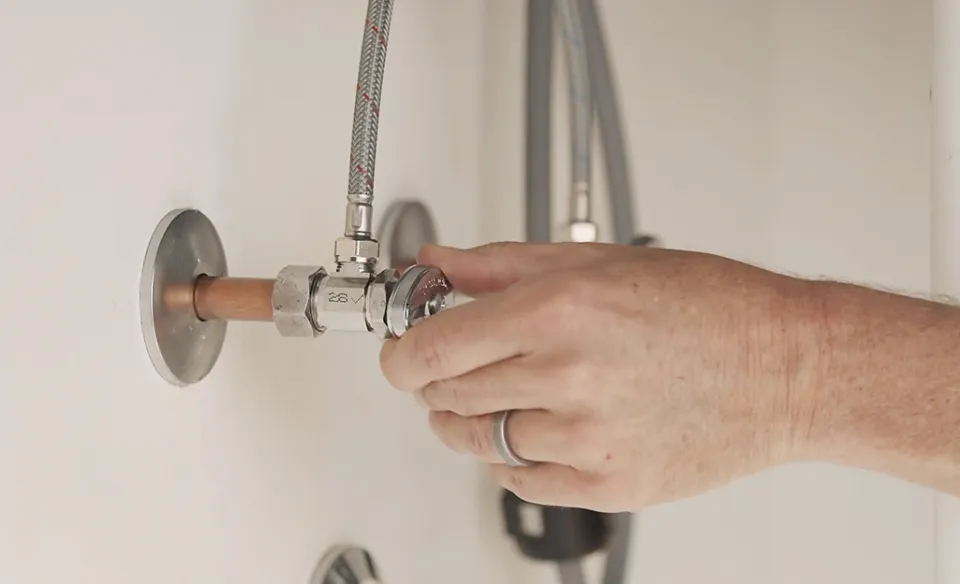
2. Disconnect the Water Supply Lines
Using your adjustable wrenches, next, disconnect the water supply lines to your faucets. Prepare your small bucket below the lines as an amount of water will inevitably remain in the lines.
3. Disconnect the Drainpipe
Use pliers to safely disconnect the drainpipe as well as any food disposal units and dishwasher drainlines. When disconnecting specialized equipment like these, check the manufacturer’s instructions to make sure you don’t break anything. A used towel can be kept nearby to clean up any spills that may happen.
4. Loosen the Metal Clips
The metal clips holding your kitchen sink to the underside of your counter should now be loosened using a screwdriver. When finished, turn them so that they are facing the center of your kitchen sink for easy removal.
5. Cut the Sealant
The seal between the counter and sink should then be broken by running your Stanley knife or other cutting tool around the sealant on the top side of the counter.
6. Remove Your Sink
You can now safely remove the old unit from your kitchen sink by pushing up from the underside and pushing in the connecting clips after everything has been safely disconnected.
Once the area has been cleaned up, use a putty knife or other flat metal tool to remove any last bits of sealant and grime from the countertop cutout’s rim.
Related Post: How to Measure Kitchen Sink?
Final Words on How to Remove a Kitchen Sink
Even though installing a new kitchen sink is simple, it takes time. There are sinks in every imaginable form, size, and material, some of which are more difficult to work with than others.
The task should go without a hitch if you follow the instructions for each step in the process above.
Read More: