Are you considering putting in an island in your kitchen but not sure how is a kitchen island attached to the floor? Then our posts are appropriate for you.
The fact that a kitchen island takes up a lot of room in the kitchen makes it fairly utilitarian. This completes the room’s design. In order to keep them from moving or toppling over while being used, kitchen islands are secured to the floor.
Continue reading for a step-by-step guide and additional helpful information.
Table of Contents
What is a Kitchen Island?
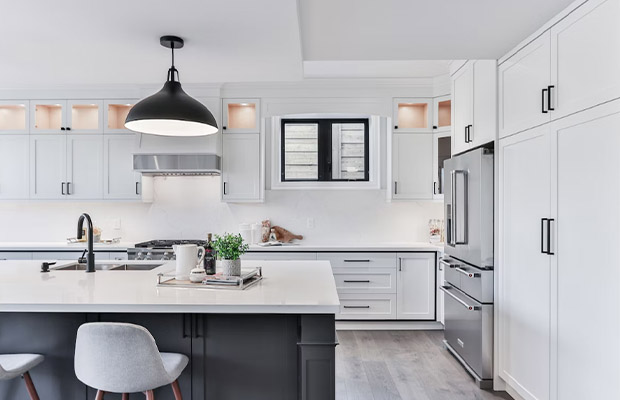
A kitchen island is a free-standing cabinet with additional counter space on top. It might coordinate with or enhance the kitchen’s current design. Stools are frequently placed all around the island to provide extra seating or a dining area.
Some kitchen islands have an additional sink and are plumbing-connected. For small appliances, pots and pans, and other miscellaneous items, some others provide additional storage.
How is a Kitchen Island Attached to the Floor?
Not every kitchen island is anchored to the ground. Several of them can be rolled into and out of the kitchen as needed and have wheels. For stability, some are anchored to the ground. Here, we’ll go over how to attach a kitchen island to the floor step-by-step.
We’ll be using wooden cleats made from 2x4s to secure the island to the floor for this project. The island will be bolted into these cleats after they have been anchored into the floor by bolts.
AD
Step 1: Position the Island
Finding the ideal location for your island is the first step. Make sure there is plenty of room on the sides for people to maneuver. In most cases, 48 inches will do, or 60 inches if you have a dining counter on one end.
After deciding where your island will go, use painter’s tape or a washable marker to draw the island’s outline on the floor.
Step 2: Measure for Cleats
The island with the highest level of security is connected by four cleats, one in each cabinetry corner. To determine how far inward the cleats should be, measure the island’s base’s thickness. The island must be able to fit over the cleats, so keep that in mind.
Use a marker or painter’s tape to indicate with precision where the wood cleats will go.
Step 3: Install the Cleats
Drill the wood cleats with pilot holes before installing. After that, put them where they should be according to the last step. Use the holes in the cleats as a guide to drill pilot holes in the floor. Each cleat should be firmly screwed into the ground.
Step 4: Attach the Island
Now is the time to take out the line or tape you originally used to mark the island’s location. The cleats that have been installed will now show you where the island is headed. Place the island’s base over the cleats by raising it; it should snugly fit over them.
Attach any trim or other finishing elements to the island after screwing the island’s base to the wooden cleats. You’ve successfully secured your kitchen island to the floor with just that.
Read More: Can A Kitchen Island Be Longer Than Cabinets?
Why You Should Attach a Kitchen Island to the Floor
Let’s first talk about why you should probably secure your kitchen island to the floor because doing so has a number of advantages.
Some of those benefits include making the kitchen island:
- More secure
- More durable
- Safer
More Secure
A kitchen island is more secure when it is fastened to the floor, which is the first advantage.
The kitchen island base cabinets must be screwed into something to prevent them from moving around while in use, just like regular base cabinets against a wall.
It won’t move or fall backward while someone is leaning against the kitchen island if it is fastened to the floor.
An island that is fixed in place also looks better because it will always be in the right place in the kitchen.
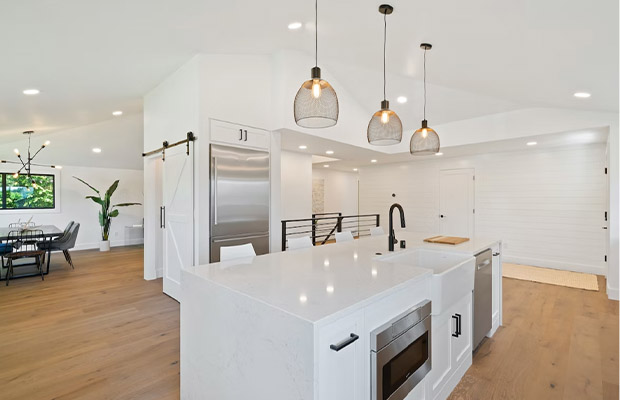
This guarantees that your island will always be perfectly centered beneath pendant lights or in front of a decorative range hood. The visual appeal of your kitchen will greatly benefit from this consistency.
Additionally, if your kitchen island is secured, you can consistently walk between it and the other cabinets or refrigerator.
You reduce the possibility of frequently bumping into the island, which can be painful and annoying, with a consistent walkway.
More Durable
The next advantage of anchoring a kitchen island to the floor is that it increases the island’s durability.
The cabinets will last forever because they are fastened to the floor and secured to one another.
However, if the island is constructed of base cabinets and is mobile, the cabinets may bump into one another or the back or side may weaken over time as a result of constant pressure.
But if it’s all fastened to the ground and secured to one another, there’s no need to worry about that.
Your possessions will last longer because they are staying put, in addition to the island, which will last longer overall.
An island that isn’t anchored to the ground runs the risk of having its contents move around or inadvertently break. However, if the island is fixed, the issue goes away.
Safer
The last advantage of anchoring a kitchen island to the floor is that it makes the island safer to be on.
We’ve already discussed how uncomfortable it is when someone leans against the island, but I also need to draw attention to the safety risk that this poses.
If the unsecure island ever topples over due to someone leaning against it without realizing that the cabinets aren’t fastened to the ground, a small child or a pet could easily be squashed.
The larger the island, however, the less likely this is to occur because your countertop will be heavy enough to hold the island in place.
Even so, anchoring an island to the ground is the best option because, more often than not, they shouldn’t ever need to move. After discussing the advantages, it’s time to talk about when it is appropriate to fix an island to the ground and when it is not.
Also Read: How to Arrange Appliances on Kitchen Counter?
Types of Kitchen Islands
Kitchen islands come in a wide variety of styles! Following, we’ll discuss a few of the most typical types.
Sink Island
In the middle of the kitchen is a sink island with a complete kitchen countertop. Naturally, an island of this type has a sink. If you need an additional space for dishwashing or using the sink, this is a fantastic choice.
Dining Island
Many kitchens choose dining islands because they are popular and practical. As a kitchen table, a dining island is an option. As an alternative, it can be an additional place to sit, munch, and converse. Normally, two to four chairs are placed around dining islands.
Cooktop Island
A cooktop island is used for both preparing and serving food. Due to the need for electrical work and vents, this is the most complicated type of island. A cooktop island typically has a stovetop, oven, and cooling vents.
Storage Island
A storage island is exactly what it says it is: extra storage space. It can be used for appliances, cookware, dishes, and other things. A storage island is frequently a smaller island on wheels that may be moved as necessary.
Food Prep Island
To add more counter space, consider installing a food prep island in your kitchen. An additional space for chopping vegetables, combining ingredients, and generally preparing food is provided by this kind of island. To make it simpler to apply downward pressure, such as when kneading dough, some food prep islands are lower in height.
How Much Does a Kitchen Island Cost?
Depending on the type of island and the materials used, a kitchen island can be a reasonably priced project. But it can also be quite expensive, especially if you want an island with a stovetop or sink. Additionally, the cost of an island can quickly increase if the top is made of materials like marble and granite.
Typically, a small rolling kitchen island made of basic materials costs around $200. Depending on the size and materials required, islands with cabinets and butcher block or stainless steel counters start at around $600. Larger islands with more features and premium materials can cost $5000 or more.
Read More:
Related Questions
Does a Kitchen Island Need to Be Anchored?
A standalone kitchen cart is also an option, but anchoring cabinets to create an island gives it a more permanent appearance and prevents it from moving around while you’re cooking.
How to Anchor Kitchen Island to Concrete Floor?
One way to secure a kitchen island on adjustable legs is to install a cleat on the floor that runs the length of the island and then fasten the island to the cleat.
Are Kitchen Islands Going Out of Style?
Kitchen islands are not out of fashion. Actually, adding islands to kitchens is a popular choice among homeowners today when they renovate their homes. A kitchen island is frequently included on the wish list of people searching for a new home.
Is a Kitchen Island the Same Height as the Counter?
Unlike kitchen counters, kitchen islands can be of a different height. It really depends on your intentions for the island.
Are Kitchen Islands Bolted to the Floor?
The floor may or may not be bolted to some kitchen islands. Wheels can be found on some smaller islands. On the other hand, some islands are so heavy that people don’t feel the need to anchor them.
Final Thoughts on Attaching a Kitchen Island to the Floor
Your kitchen will become more attractive and functional after you install an island because it will have more workspace and storage.
To keep kitchen islands firmly in place and guard against shifting or tipping over, they are fastened to the floor. A kitchen island should be anchored to the ground because, aside from portable, store-bought islands, it is intended to be a permanent fixture in the kitchen like the other base cabinets.
You can now make wiser decisions for any potential future kitchen remodeling projects because you have a better understanding of how kitchen islands are built.
Read Next: How To Accessorize A Kitchen Counter?